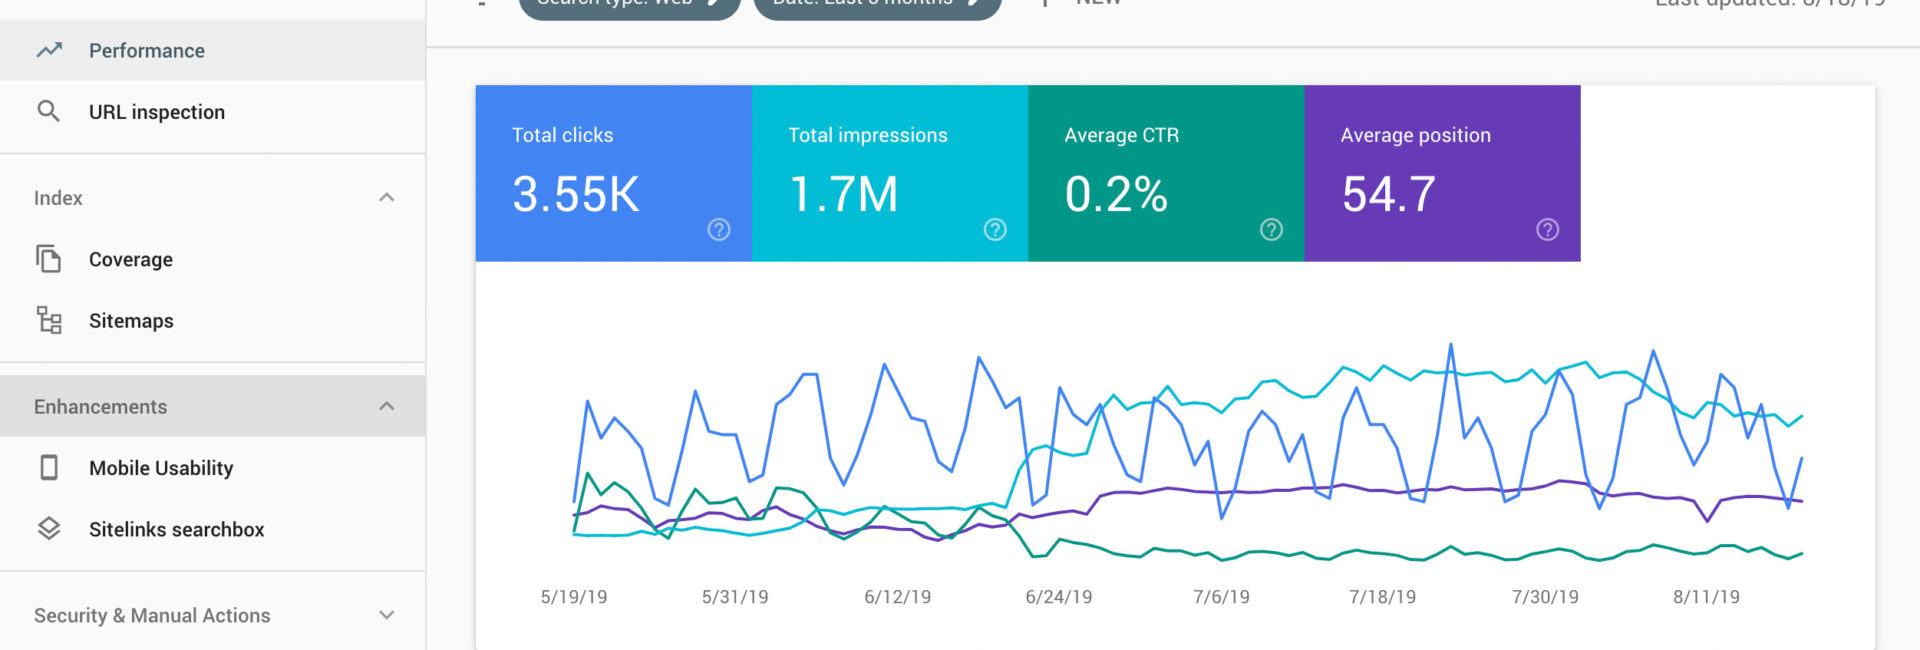
How to Set Up Google Search Console
Want to know the exact search keywords that are bringing visitors to your website? Google Search Console is what you need to set up.
Google Analytics or your website stats may already tell you how much overall “organic search” traffic you have to your website. But what are those visitors searching for in order to find you? Your name or your company’s name (“Adrienne’s Events”)? Or are they discovering your business by searching for what you do (“wedding planner in South Carolina”)?
Take 15 minutes to set up Google Search Console, and you’ll know.
It’s free. It’s informative. It’s a little confusing. But I really think it should be set up for every website. Let’s talk about how to do it.
In this Post
The Easiest Way to Set up Google Search Console
Step 1: Sign In
Go to Google.com. In the upper right corner, click “Sign In” or make sure you are signed into the Google Account that you want associated with Google Search Console.

If you already have Google Analytics, make sure you are signed into the same email address that is used for your Analytics account.
Step 2: Enter Your URL
Now go to https://search.google.com/search-console/welcome
The easier option on the Welcome screen is URL prefix. (See the next section below for my preferred but trickier verification method).
You’ll need to enter your website’s home page URL here. To get your correct full URL, open your own website home page in a new tab. Highlight the URL in the box and copy it.

This is to make sure you enter your complete URL. If your site is https://yourdomain.com/ it needs to be that exact URL. Don’t forget the / at the end.
Then paste the URL into the “URL prefix” box.
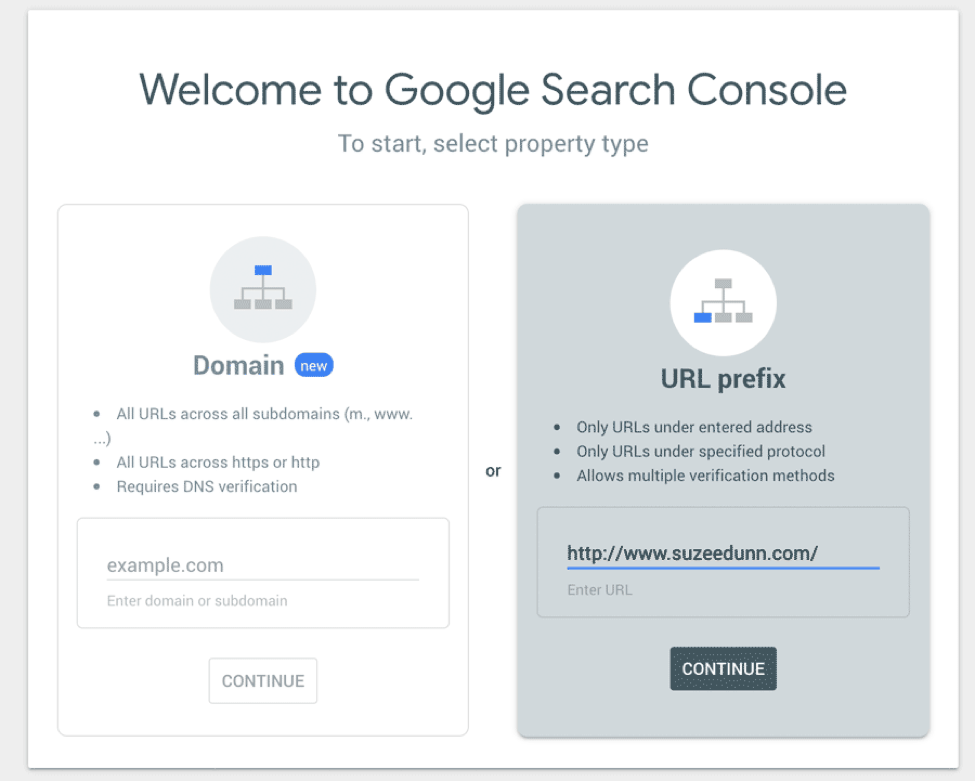
Click the Continue button.
Step 3: Verify with Google Analytics if you can
Google Search Console will offer a few verification options. I like to go for the easiest one first, which is Google Analytics. Look for the Google Analytics option and click on it.
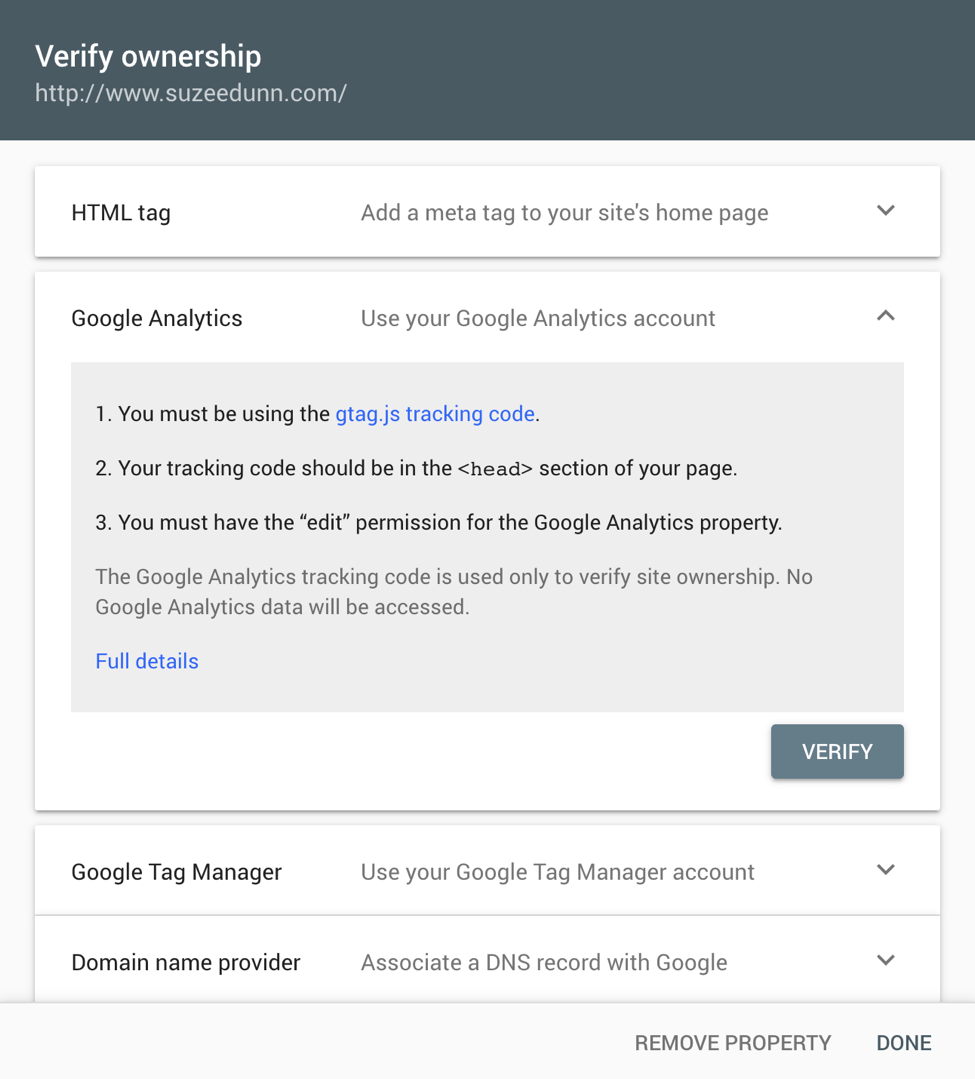
Then click the Verify button.
If you have Google Analytics installed on your site and have “edit” permissions for that account, this should verify automatically.
If you’re pretty sure you have Google Analytics and this doesn’t work, make sure you’re logged in with the same email address that has permissions on Google Analytics.
If this doesn’t work…
Try the “Better But Tricker” option outlined in the next section.
Or, continue here with the “HTML Tag” verification.
Where you enter this HTML tag varies depending on your website platform. I have included links to help articles for different website platforms below.
- How to verify Google Search Console on WordPress (you must have the Yoast SEO plugin installed)
- How to verify your site on Squarespace
- How to verify your site on Showit
- How to verify your site on Wix
The Better But Trickier Way to Set up Google Search Console
This method of verification is better because you will get more complete data for your entire website. However, it involves logging into your domain provider and adding a domain record, which can be a little hard to track down.
It’s worth a try, though, for the great data!
Step 1: Sign In
Go to Google.com. In the upper right corner, click “Sign In” or make sure you are signed into the Google Account that you want associated with Google Search Console.

Step 2: Choose Domain verification
Now go to https://search.google.com/search-console/welcome
In the box on the left, type your domain name with no https://, no www, and no ending /. Just the plain yourdomain.com
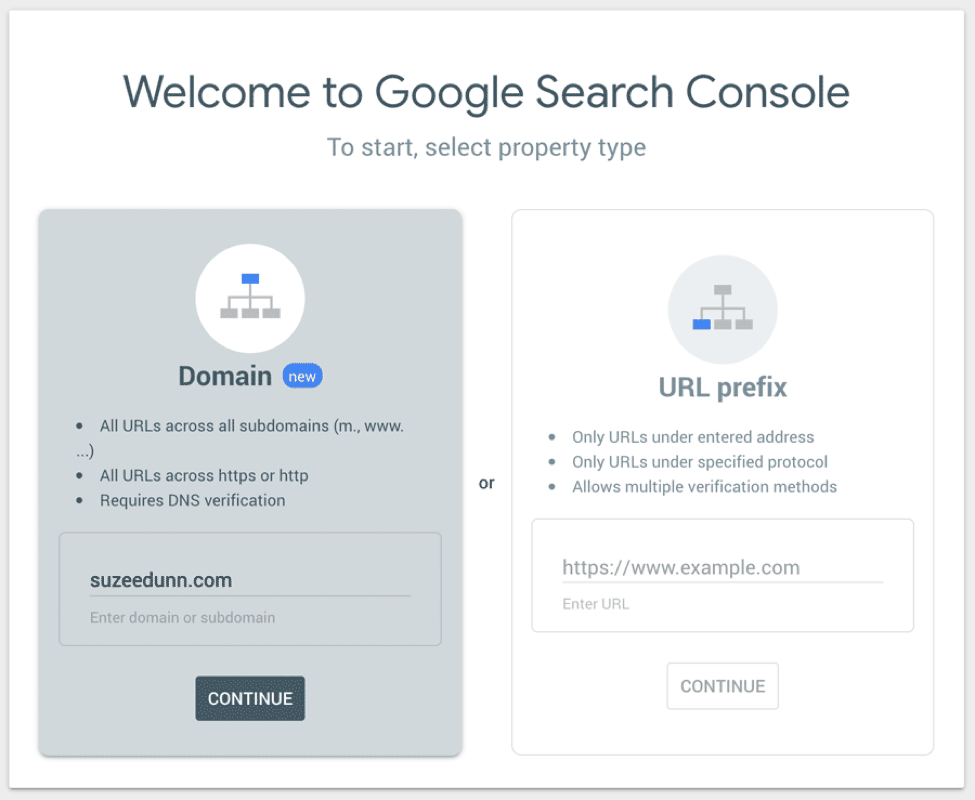
Click Continue.
Step 3: Create a TXT record for your domain
You’ll see a new screen of instructions pop up.
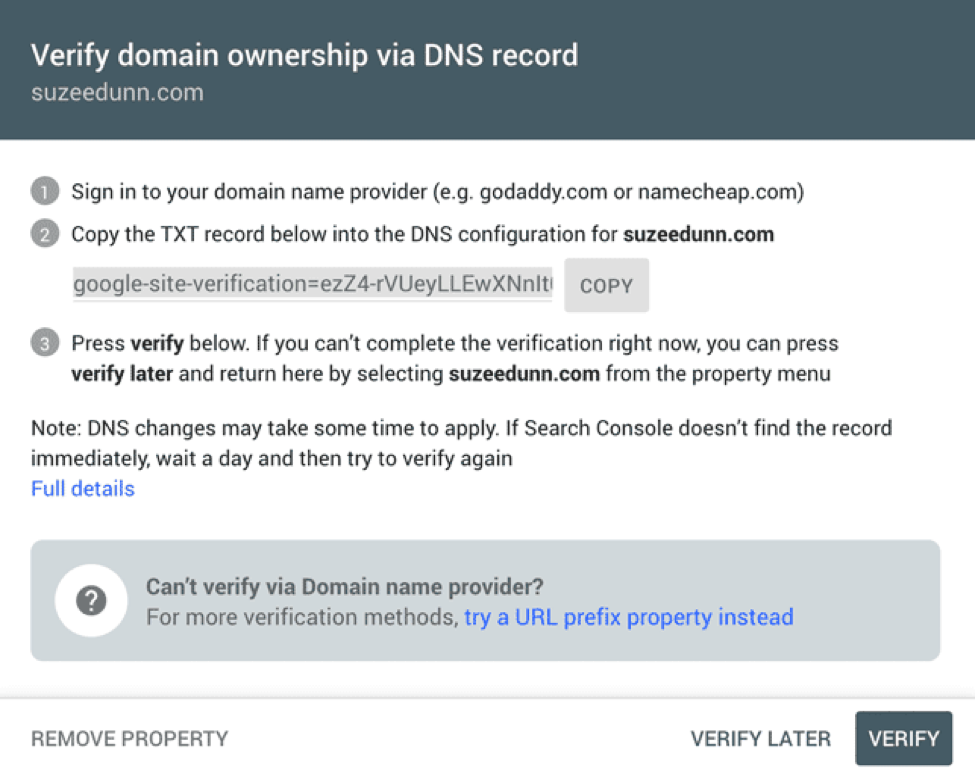
Here’s what’s tricky about this—
You have to
a) remember where you bought your domain name (GoDaddy? Namecheap? Hover?), and
b) figure out how to add a TXT record.
This differs for every domain registrar, so here are a couple help articles depending on where you bought your domain.
- How to add a TXT record on GoDaddy
- How to add a TXT record on Namecheap
- How to add a TXT record on Hover
- How to add a TXT record on Domain.com
Here is an example of how you’d need to enter it on GoDaddy.

Step 4: Check that the verification worked
Once you go through your registrar’s process, it can take some time for the new TXT record to be recognized.
You can still check right away. Return to that popup on Google Search Console and click the Verify button.
Hopefully, this is what you’ll see:
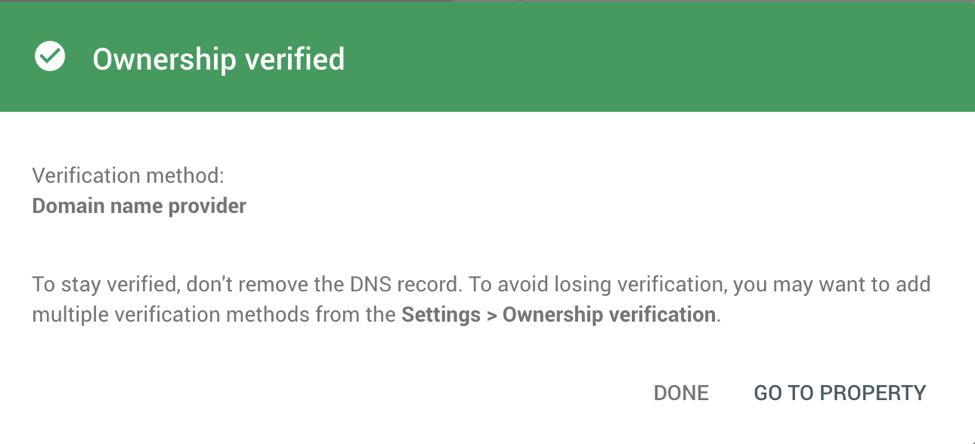
If your ownership is not verified, wait 30 minutes and try to click the Verify button again.
If it still doesn’t work after 2 to 3 hours, you might want to contact support for your domain registration company to make sure you did it correctly.
Step 5: You’re in!
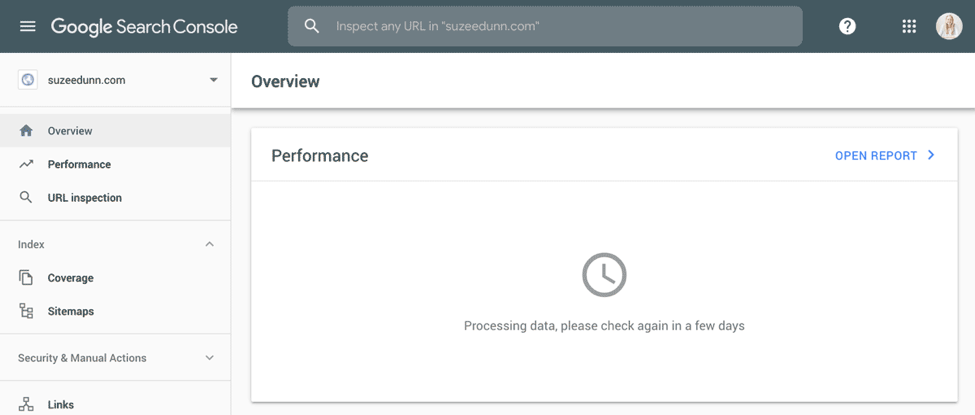
If your site has never been verified on Google Search Console before, you will not initially have data. Come back here in a couple days, and there will be much more to see.
Stay tuned for future resources on how to use your Search Console data now that you’re all set up!

The SEO Basics Guide for Wedding Professionals
Get instant access to my top SEO tips, including only what's working right now.

Every creative wedding pro needs a geeky best friend. Let me help you and your work get found online.