Why You Need Google Analytics for Your Wedding Business
How many visitors were on your site last week? How did they find you? How long did they stay?
I hope you have a tool that can give you answers to these questions.
I am a total geek (especially about stats and tracking results by the numbers) so I love Google Analytics.
Don’t worry, I don’t expect you to gleefully comb through unique visitors, acquisitions, and conversion tracking like I do. But you should at least know what it is and have it set up for your wedding business website.
In this Post
What is Google Analytics anyway?
Google Analytics is a free tool created by Google that tracks your website traffic. Once it is installed on your website, the Google Analytics tracking code sends information to Analytics every time a visitor loads a page on your website.

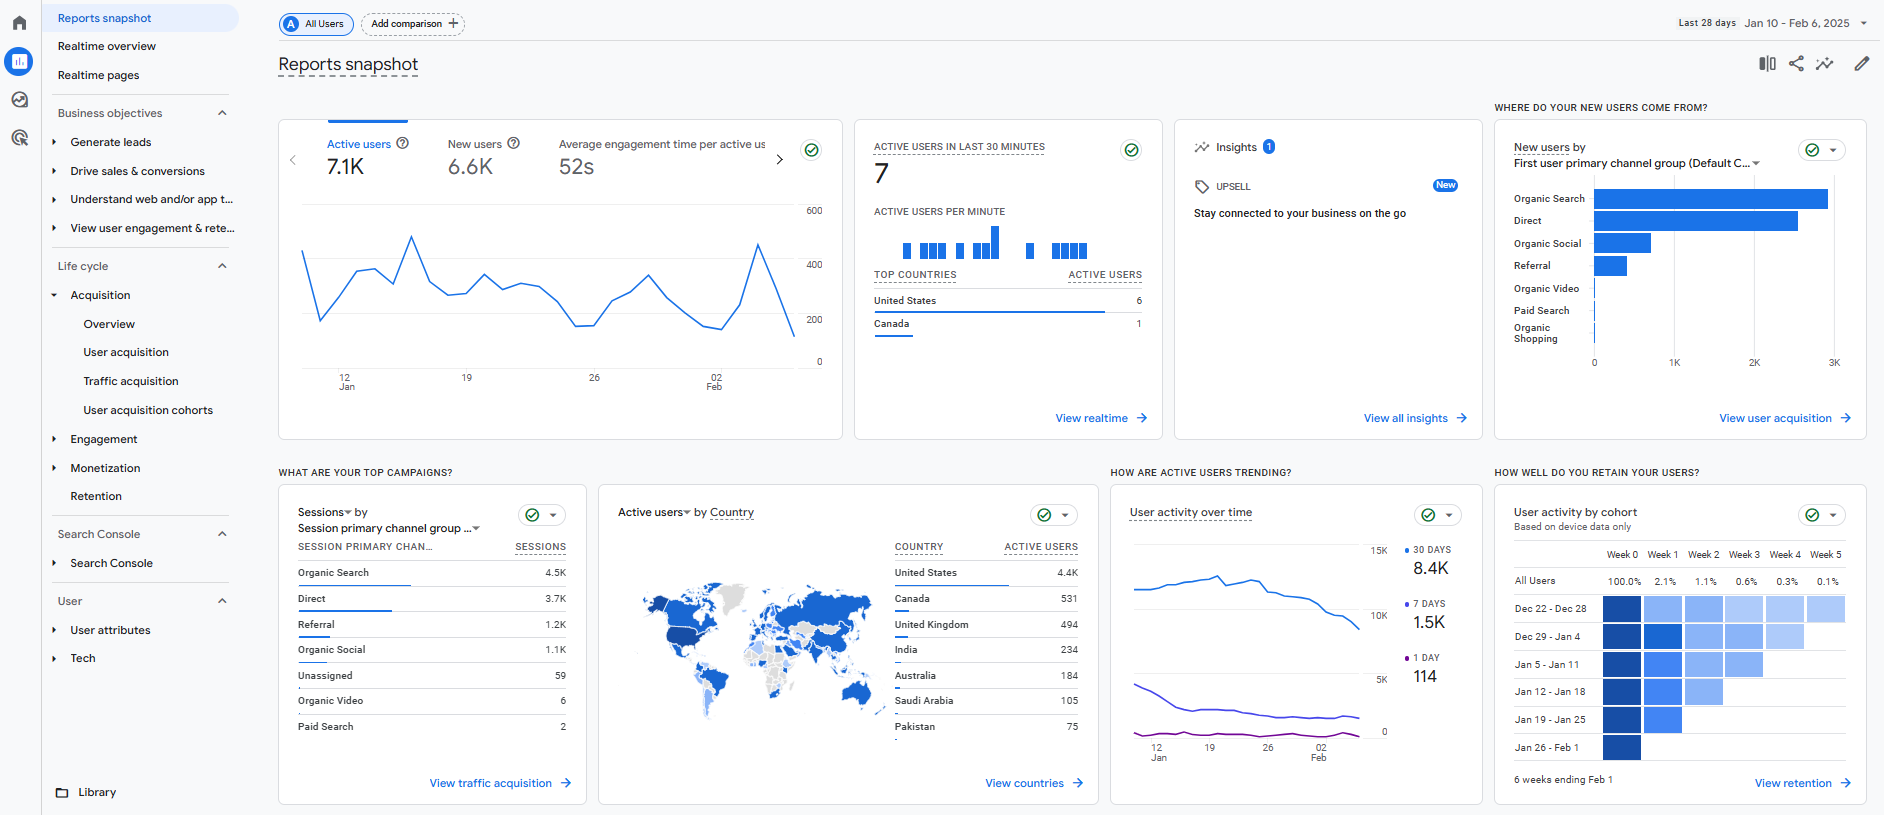
This allows you to review reports of all sorts of useful data about your website visitors, like if they were referred from another website or came to your website through a link on social media (and a lot more).
When I’m working on an SEO Roadmap for my wedding SEO service clients, I’m always so bummed if they don’t have Google Analytics set up. Without Analytics, we are missing a ton of basic data about your current website visitors and how they are finding you. Don’t miss out!
5 Things You Should Know About Google Analytics
It’s Free
It don’t cost nothin’! Google Analytics has been around since 2005 and has always been free. I don’t expect that to change anytime soon. So all it will cost you is a little time in setup.
It Doesn’t Track Stats Until You Set it Up
Google Analytics isn’t tracking any data about your site until you set it up and install the tracking code.
That means the sooner you set it up, the better. Even if you don’t have time right now to learn about Analytics reporting, set it up anyway. Then, when stats become more important for you, you’ll have weeks, months, or years of historical data to analyze.
Every time we launch a website project, we install Google Analytics on day one, so that stats are always available for our clients.
It’s Powerful
The more you dive into Google Analytics, the more you will be amazed at all it can do. Here are a few things you can learn from Analytics data:
- How many unique visitors came to your website last month
- How long visitors stayed on your website
- How many pages they viewed
- Which pages tend to make visitors leave
- The most common paths through your website (for example, if users tend to land on your home page, then click the “About” page, then the “Services” page, then the “Contact” page)
- Which social media channels are driving the most visitors
- How many visitors find you using search engines
- Which of your blog posts are the most popular
- What percentage of your visitors are on a mobile device rather than a computer
- Where your visitors are located in the world
And so much more (data geeks rejoice!).
You Can Ignore Most of It, Honestly
What I hear a lot from business owners who try to look through their Analytics data is “OMG, there is so much there, I don’t know what to look at!”
It’s true. Google Analytics tracks a lot of user behavior and creates a ton of reports. But don’t let it overwhelm you.
A lot of the information in Google Analytics isn’t super useful and actionable for wedding and creative businesses. You’ll want to focus most of your attention in the “Audience” and “Acquisition” sections. Ignore the rest to start.
It’s Not Hard to Install
Almost every website platform has a quick way for you to install your Google Analytics tracking code. The whole setup shouldn’t take you more than 15 minutes. I’ll link to how-to’s below.
But What if My Platform Has Its Own Stats?
Is your website on Squarespace or another platform with built-in stats in their dashboard? Yes, you should set up Google Analytics anyway.
Think about it: if you ever want to change website platforms, you’re going to lose all of your historical data if you only use your platform’s statistics. Years of traffic data gone. And trust me, it’s fun to see over the years how your website traffic grows and changes.
Google Analytics is free anyway, so you have nothing to lose in setting it up, even if you don’t want to dive into using the Google Analytics reporting and dashboards right now.
How to Set Up Google Analytics
Setting up Google Analytics is a little bit different on every website platform. Here are a few great how-to articles that will hopefully stay updated in the future:
- How to Set Up Google Analytics on Squarespace
- How to Set Up Google Analytics on WordPress with Site Kit by Google
- How to Set Up Google Analytics on Showit
- How to Set Up Google Analytics on Wix
- How to Set Up Google Analytics on Pixieset
I hope that helps scrape the surface of Google Analytics for your wedding industry website. More resources to come! Please feel free to comment below with any Analytics questions.
Updated Feb 2025

The SEO Basics Guide for Wedding Professionals
Get instant access to my top SEO tips, including only what's working right now.

Every creative wedding pro needs a geeky best friend. Let me help you and your work get found online.